My trees are up and (almost) decorated... but I still have a little more to do. As we selected our fresh tree over the weekend, I was reminded of just how many trees I have decorated - for myself and for clients - so I thought I'd share some photos I've collected over the years and walk you through my process.
I don't care for tree skirts, I prefer containers or additional greenery. I have "planted" trees in baskets, boxes, urns, and various pots. However, most of the tree stands in my home are covered with wreaths that I've simply split open and placed around the stand itself. Once you've gotten your tree up, here's what you do...
- Start wrapping the lights around your tree starting at the top. If your tree sits in a corner, you can simply swag the lights back towards the front once you've reached the wall. I don't go over the top because I prefer the decorations to take center stage. I use approximately 400 lights for a 8' tree. As you wrap, stand back occasionally and squint. You'll be able to tell if you're distributing the lights evenly using this very (technical ;o) method.
- If you're working with garland, this gets placed next. Use the same method as above, but be sure to swag the garland in either the opposite direction or just below or above the light strands.
- I place my tree topper before I decorate the rest of the tree so I don't knock anything off afterwards.
- Unwrap all of your ornaments and hang the largest, prettiest goodies at eye level and right in front. If you have several identical ornaments, place one towards the top, bottom, and on either side for better balance. Do this for all of your collections. Now place smaller ornaments at the top and work your way down to larger ornaments at the bottom. Create depth by placing large balls on the inside limbs for added sparkle and shine.
- Nestle unique items in among the branches. I have several pieces of sheet music I place in open nooks and crannies as a surprise.
- Finally, I place crystal icicles on the very tips of the branches as my finishing touch.
I love this tabletop tree. You can use lots of household items you may already have on hand as ornaments and hang them with pretty bits of ribbon.
We strung miles and miles of popcorn and cranberries on our tree when I was a child. Because our family ornaments were a mix of handmade and store bought, I decided that my children should have a tree of their own so they could have fun creating their very own designs. I have been buying each of them their own ornaments since they day they were born. Now family and friends join in on the fun. (They make great presents!) Here is a wonderful and simple children's tree you can recreate with paper or felt.
This photo was the inspiration for the tree in my daughters' room. The Nutcracker came to life with wooden character ornaments, yards of candy dot garland, and gumdrop branches. Gather twisted branches from your yard and place one gumdrop on each end, then simply stick the branches in among the boughs.
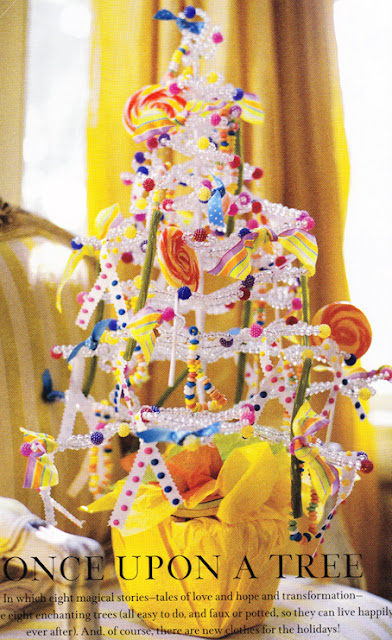
Here's another great idea. Who says trees need to have branches at all? Now use lots of candy - lollipops, candy necklaces, candy canes, shoelace licorice... whatever you can come up with!
Images scanned from BHG, Country Living, and Victoria magazines


4 comments:
Thanks for your tips! Love some of these Christmas looks, esp. those coloured ribbons!
Thanks for the great tips! I always struggle with ways to hide the base. Thanks for the inspiration! x Ophelia
You're both very welcome. Merry Christmas!
Bonjour Kimberly,
This is a great list of tips. Loce the tree nestled in the silver urn.
Are you getting ready for the holiday? Cannot believe it is less than one month away.
Hope you are having a lovely week,
Mimi
Post a Comment